Open topic with navigation
Define a Non-National Sampling Frame
To define a non-national sampling frame
- Click the Define
Non-National Geography button
 .
.
-- or --
On the Define
Frame menu, point to Define Geographic.
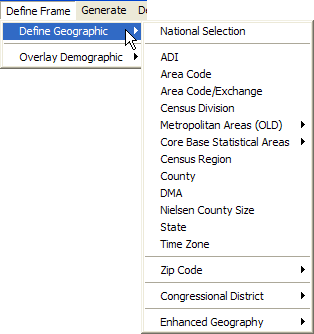
- Click a parameter other
than National Selection, such
as State. A
Non-National
Geographic Frame dialog box opens. The State tab is selected.
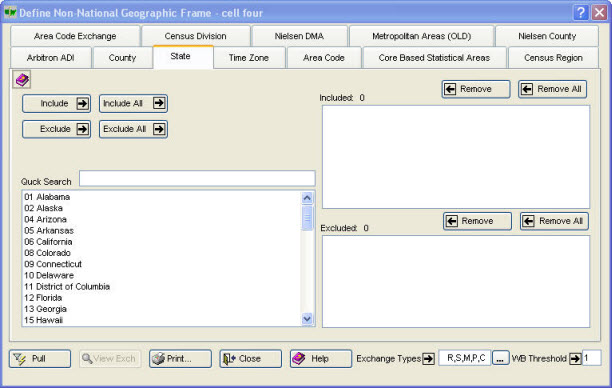
Include
 , Include All
  , Exclude
  , Exclude All
  , Remove
  , and Remove All
  are provided for convenience. Move
between different geographic definitions by clicking on different tabs.
The left box displays the individual parameters available within the geographic
definitions.
are provided for convenience. Move
between different geographic definitions by clicking on different tabs.
The left box displays the individual parameters available within the geographic
definitions.
- Define the cell's geography.
To select
an item and move it into the Included box
- Type the first character or two of the item into Quick Search
box.
- Do one of the following:
- Click the item
to select it. Click Include
 .
.
- Double-click
the item.
Multiple selections
can be made in a few ways.
For
non-successive items:
- Select
the first item by clicking it.
- Then,
while holding down the CTRL key, scroll to the other items and click them.
For successive
items, do one of the following:
- Select
the first item, hold down the SHIFT key, scroll down, then click the last
item.
- Select
the first item, then drag down to the last item.
Note: Items can be excluded by placing them in the Excluded
box. Click Exclude
or Exclude
All .
- After the cell has been
defined, including Exchange Types
 and WB (Working
Bank) Threshold
and WB (Working
Bank) Threshold  ,
click Pull
,
click Pull  to retrieve
the corresponding exchanges. A message
displays the number of exchanges pulled that serve the defined geographic
area.
to retrieve
the corresponding exchanges. A message
displays the number of exchanges pulled that serve the defined geographic
area.

(Click
OK  .)
.)
- The exchanges pulled
can be viewed by clicking View
Exch
 . A
View Exchanges
dialog box opens.
. A
View Exchanges
dialog box opens.
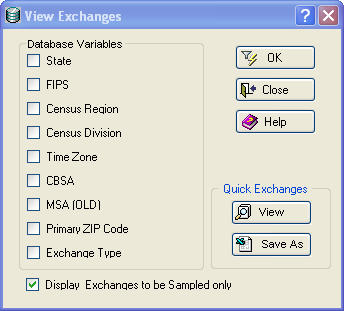
- Select options from the Database
Variables group box. To
view or save the data, click
View
 or Save As
  , which are
located in the Quick Exchanges
group box. Click OK
, which are
located in the Quick Exchanges
group box. Click OK  .
.
A View
Exchange to be Sampled Report opens.
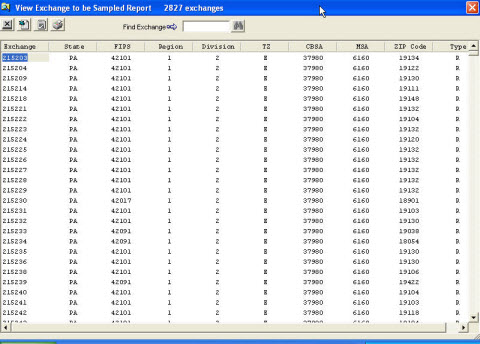
This report can be saved as a spreadsheet
 or as an ASCII file
  , or printed
  .
.
Open topic with navigation